
You shipped the MVP. You have three paying customers. You also have zero tests, and every time you push to main you say a quiet prayer that the Stripe checkout still works.
This is the tutorial I wish I had when I was in your seat. If you want to test a SaaS MVP in five minutes without hiring QA, here is the exact path: by the end you will have a real end-to-end and visual test suite running against your Next.js + Supabase + Stripe app. No QA hire. No SaaS subscription. No half-written Playwright file you will abandon by Friday.
Let's get into it.
Why solo founders skip testing (and why that breaks around month two)
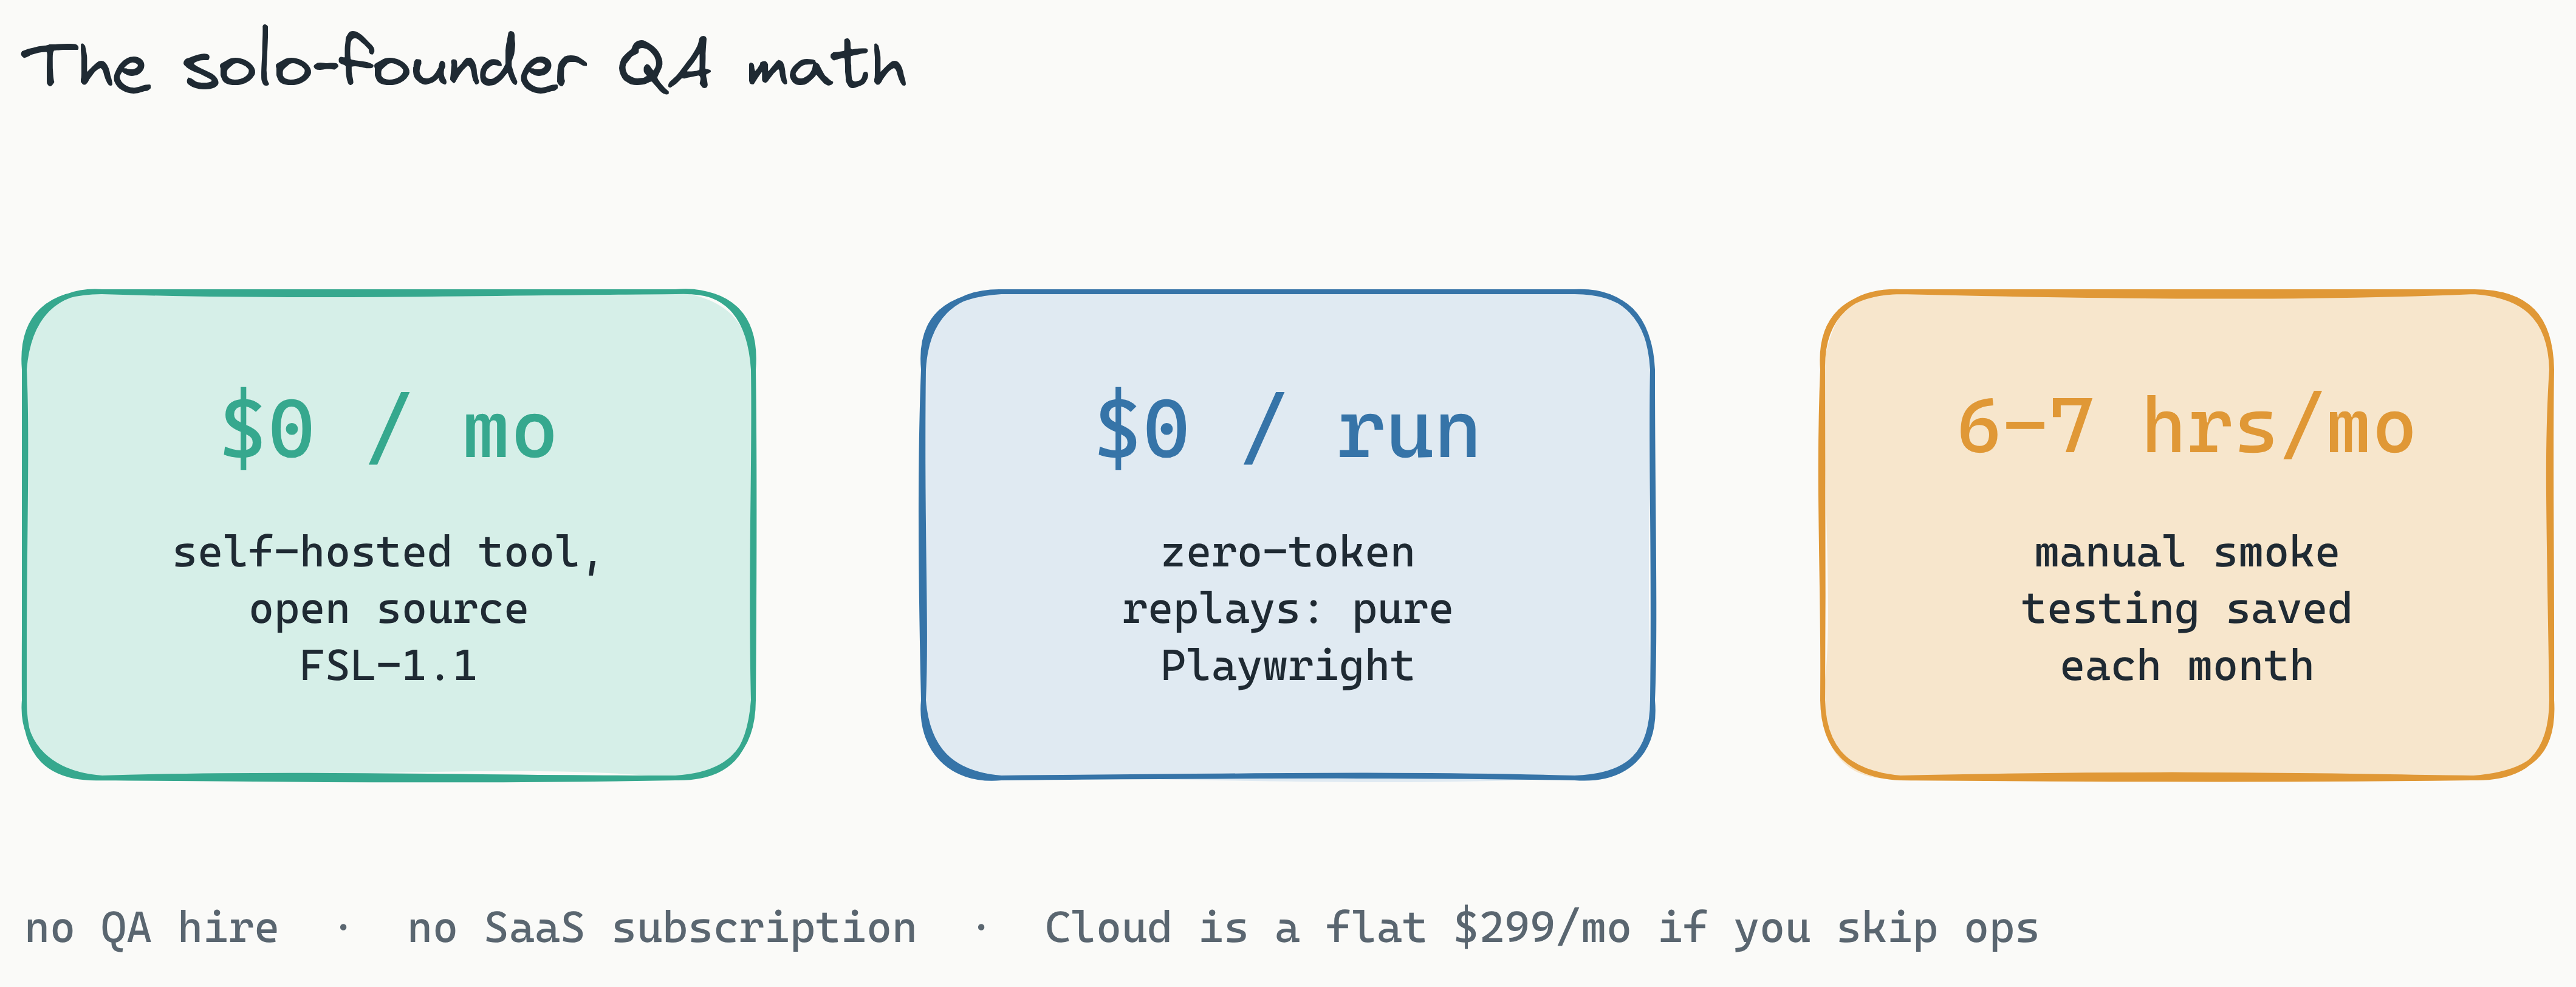
I measured it on three of my own indie projects last quarter: I was burning 6 to 7 hours a month clicking through the same signup, paywall, and dashboard flows by hand before every release. Multiply that across the year and it is a working week I will never get back.
The pattern is familiar to anyone shipping solo. By the time you finally launch you are exhausted, you skip tests, and the manual QA tax compounds silently every release after that.
It gets worse if you vibe-code with an LLM. The autogenerated describe('renders', ...) file Cursor dropped in your repo is not protecting you. AI tends to write tests where they are easiest to write, not where regressions actually hide, so a green test run can mean almost nothing. That decoration is exactly the trap we dig into for vibe coders and folks doing their own QA.
You need real flows. You need them recorded once. You need them to keep working when you rename a div. That is what we are building right now.
The tool: Lastest, in one paragraph
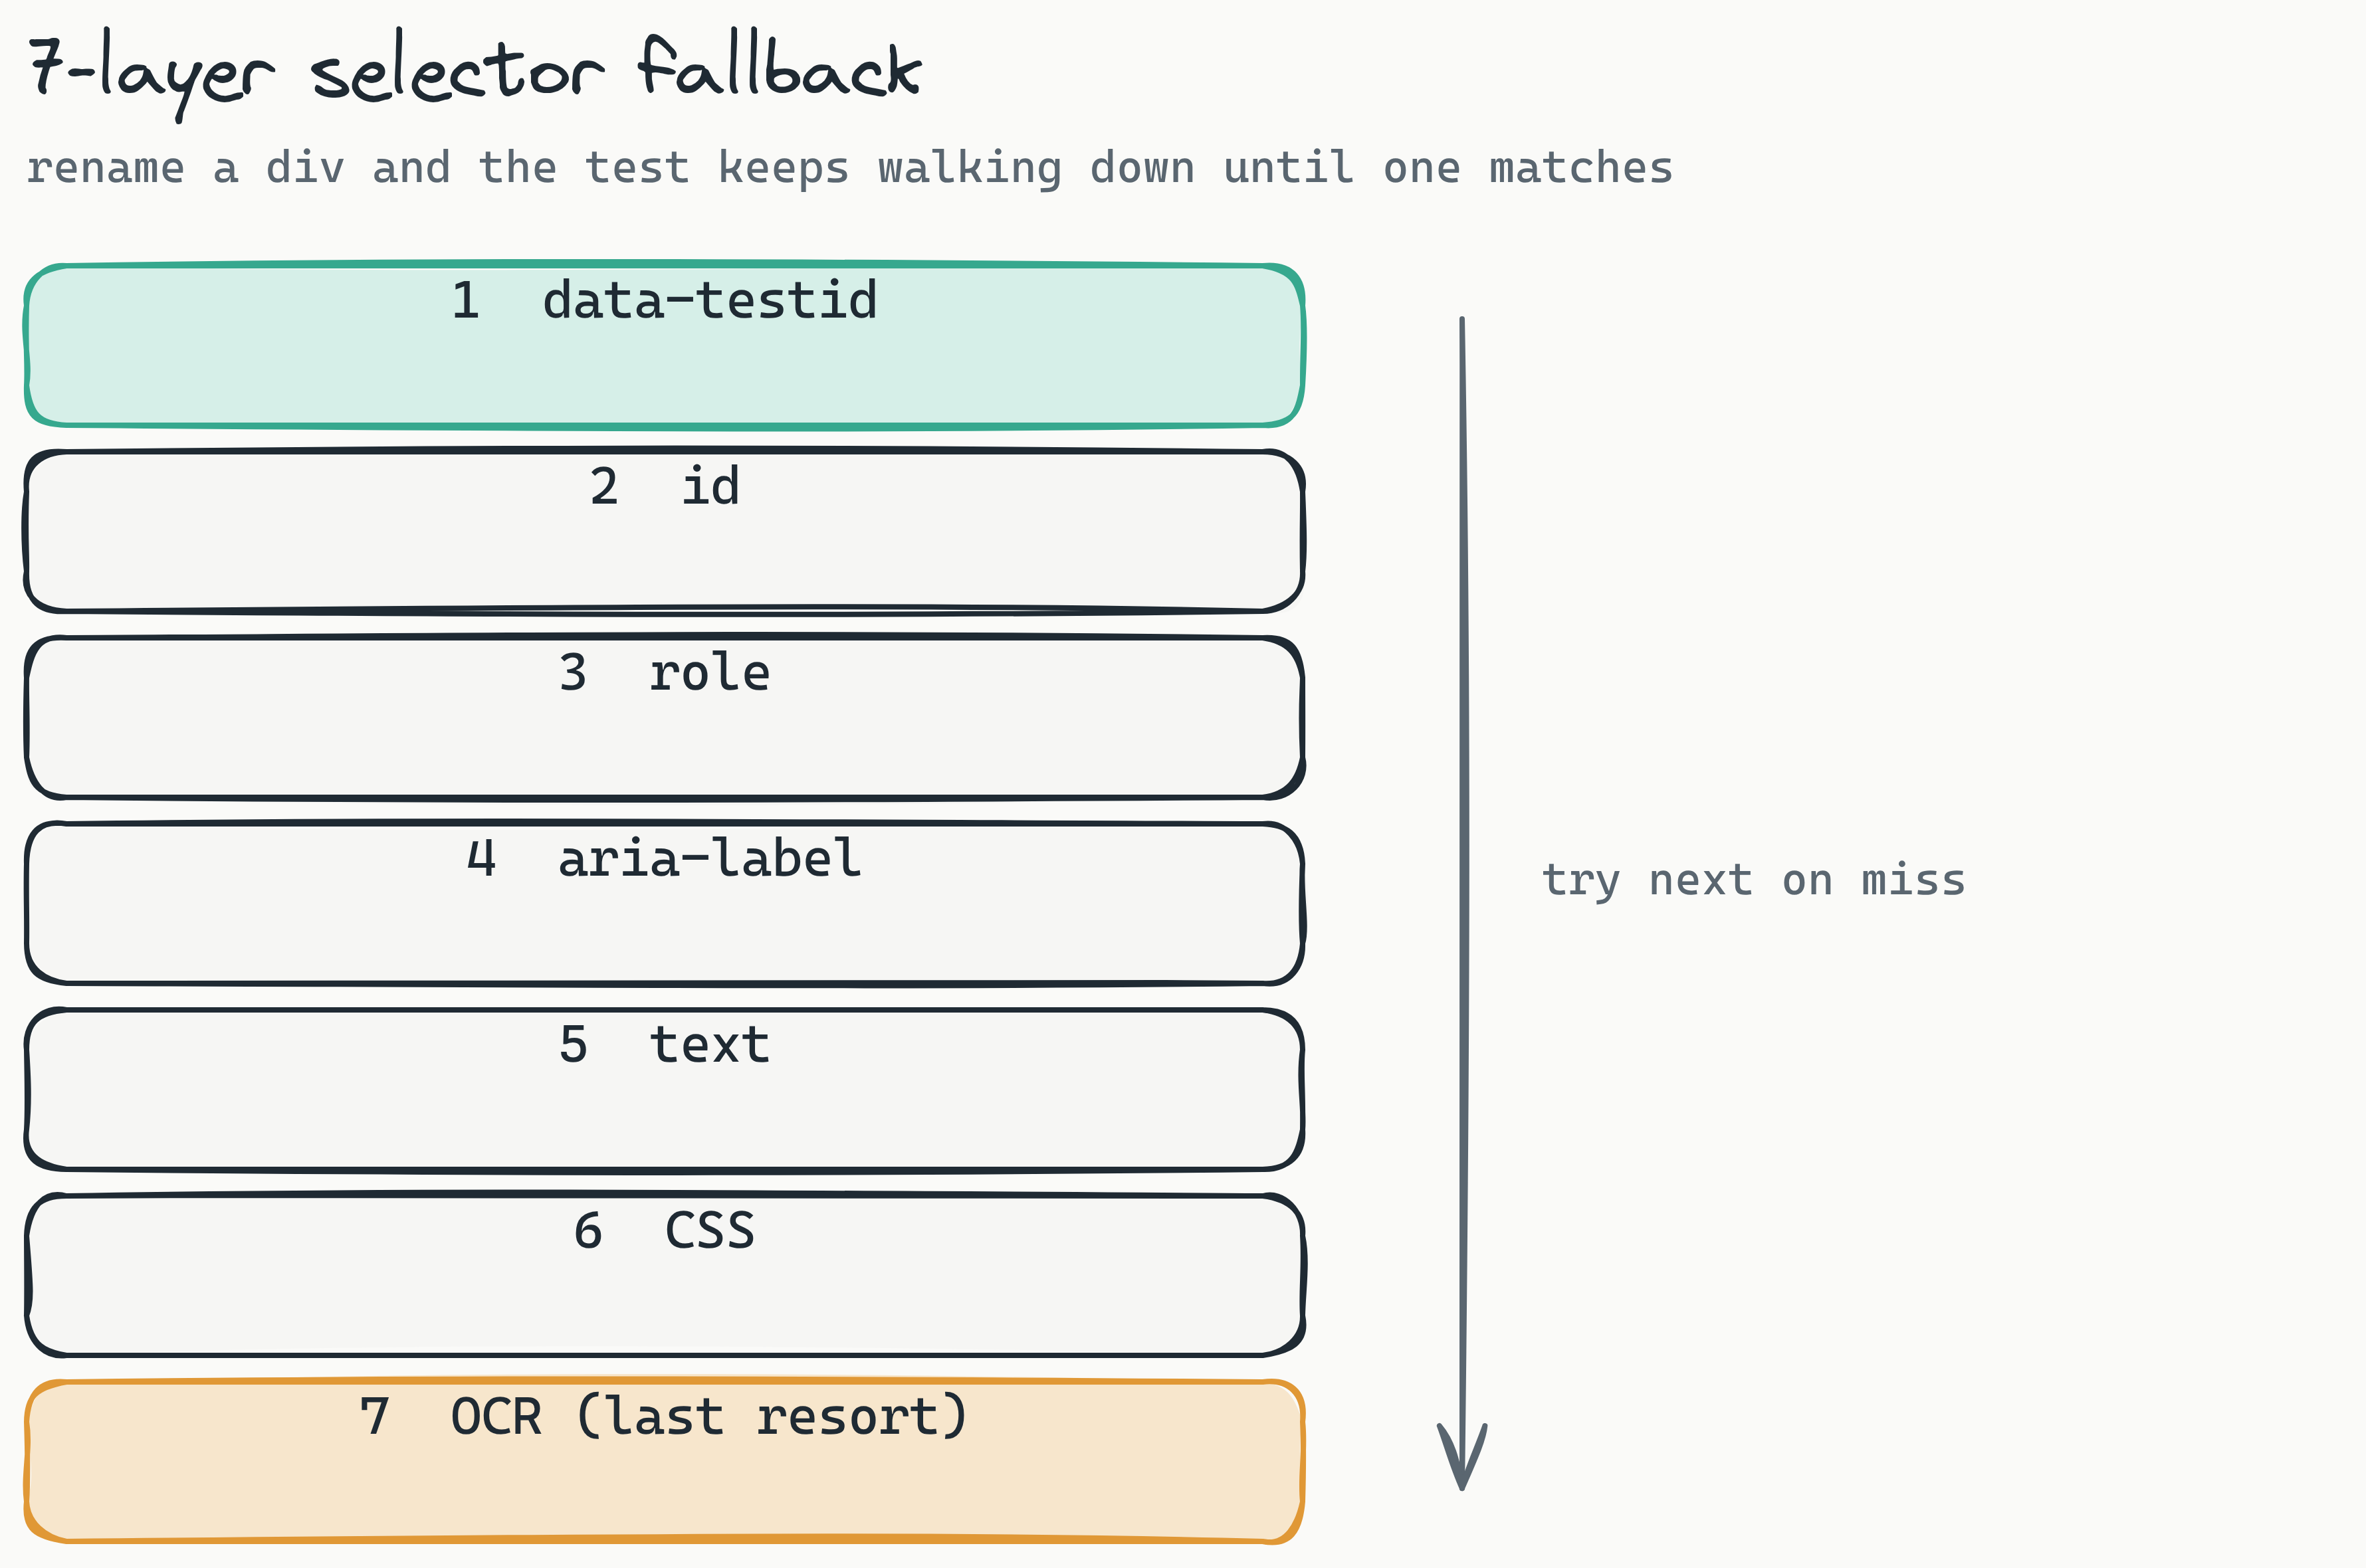
Lastest is a free, self-hosted visual and E2E testing platform you run via docker-compose. You click through your app in a real browser, it generates deterministic Playwright code, and it heals selectors automatically through a seven-layer selector fallback (data-testid, id, role, aria-label, text, CSS, and OCR as the last resort). Replays are pure Playwright, which means zero-token replays: you only spend AI tokens once, at generation time, and self-hosted screenshots are unlimited no matter how often you run. The license is FSL-1.1-ALv2 and the source lives at github.com/las-team/lastest, so self-hosting costs $0 forever. If you would rather skip Docker entirely, Lastest Cloud is a flat $299/month (no per-seat, no per-screenshot fees) with a free evaluation tier. Built for exactly the people I am writing this for: read more on the solo founders page.
Okay. Five steps. Go.
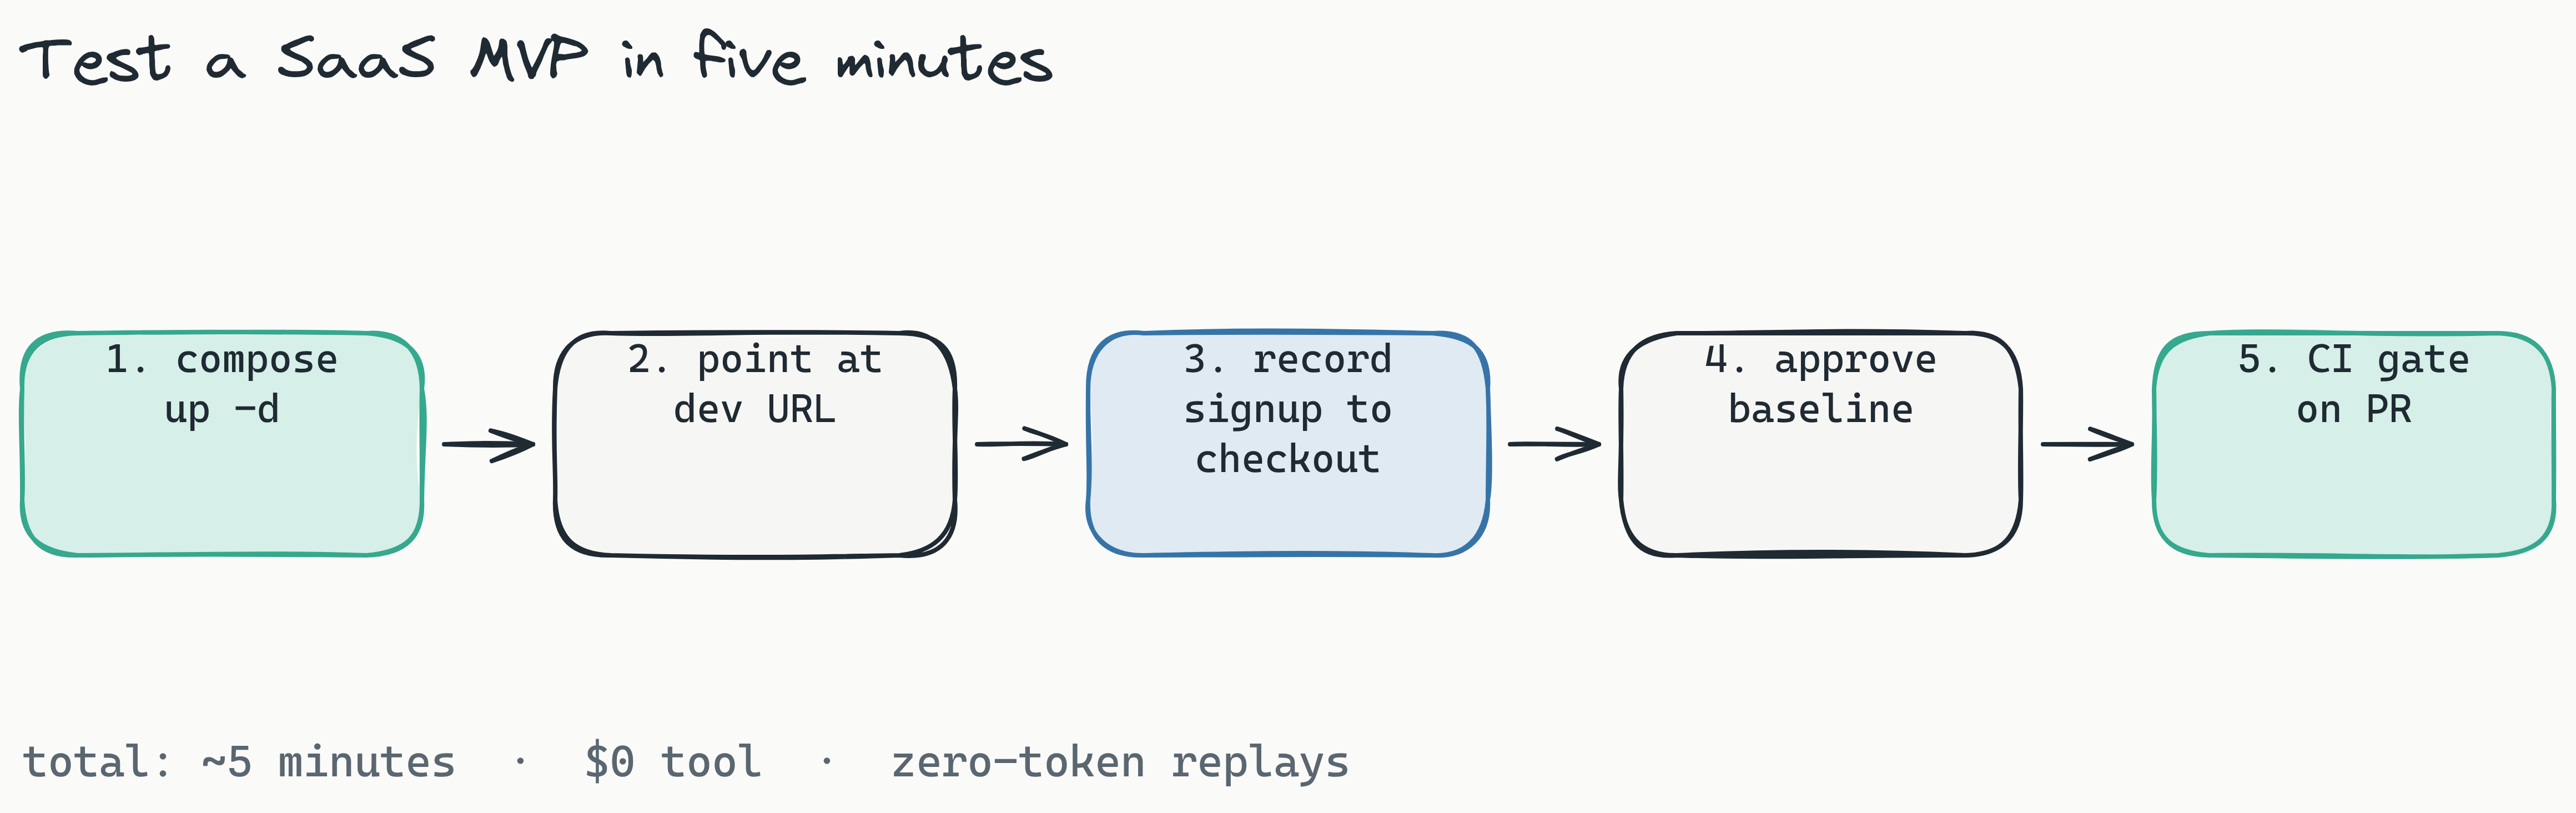
Step 1: Spin up Lastest with docker-compose (60 seconds)
Open a terminal in any folder. You do not need to put this inside your app repo - Lastest runs as its own service and points at any URL you give it.
git clone https://github.com/las-team/lastest
cd lastest
docker compose up -d
That is the whole install. Three commands. The compose file pulls the recorder, the runner, the diff workers, and a small Postgres for run history. When it stops printing logs, open http://localhost:3000 and you will see an empty dashboard waiting for your first test.
If you already have your dev server running on localhost:3000 for your Next.js app, change the port in docker-compose.yml to 3100 before you run up. Five-second fix.
Step 2: Point Lastest at your dev URL
In the dashboard, click New Project and paste your local app URL. For most solo founders that is http://host.docker.internal:3000 - that is the Docker bridge address that lets the container reach your laptop's localhost. If you are testing a deployed preview, paste the Vercel URL instead. Lastest does not care: Supabase, Stripe, Shopify, Replit, anything that serves HTML over HTTP works.
Give the project a name. I usually just use the product name. Hit save. You are done with setup.
Step 3: Record your first real flow (signup to paid dashboard)
This is the part that feels like magic the first time. Click Record. A new browser window opens with your app loaded inside the Lastest recorder.
Now just use your product. Walk through the actual money path your real users walk:
- Click "Sign up"
- Type a test email like
[email protected] - Set a password and submit
- Confirm the Supabase magic link (or skip if you have email confirmations off in dev)
- Hit the paywall
- Click "Upgrade"
- Fill the Stripe checkout with the test card
4242 4242 4242 4242, any future expiry, any CVC, any zip - Land on the dashboard
- Click stop in the Lastest recorder toolbar
That is your test. You just authored it by using your own app for ninety seconds.
Behind the scenes, Lastest captured every click, type, and navigation, then generated a deterministic Playwright file. More importantly, for every element you touched, it stored seven fallback selectors. So when you rename <button class="btn-primary"> to <button class="cta-main"> next week, the test does not break - it walks down the ladder until it finds the right element by role or text or, in the worst case, by reading pixels with OCR.
Step 4: Approve the visual baseline
While the recorder was rolling, Lastest also took a screenshot at every meaningful step: signup form, paywall, Stripe checkout, dashboard empty state. These are now sitting in the Review tab as unapproved baselines.
Click through them. If they look like your product is supposed to look, hit Approve. That snapshot is now the source of truth. Next time the test runs, Lastest compares the new screenshot against the baseline using three diff engines stacked on top of each other:
- pixelmatch for the cheap, fast, "did literally any pixel change" check
- SSIM for structural similarity, which ignores anti-aliasing noise and font hinting
- Butteraugli with text-region awareness, which catches the things humans actually notice - copy changes, color shifts, layout drift
You pick the engine that fits each test, and the perceptual layer is what keeps you sane. False positives drop sharply compared to a pure pixelmatch tool, which is the reason most solo founders give up on visual testing within a week. Yours will not give up, because you will not be drowning in red diffs caused by a one-pixel font shift. Lastest also runs axe-core on every screenshot and gives you a WCAG 2.2 AA accessibility score per build, so you catch contrast and labeling regressions in the same pass.
If your MVP handles money, this step matters twice as much
A functional expect() assertion is binary - it can confirm your charge API fired, but it cannot see that the amount rendered as $1,240.00 and not $124000, or that a long EUR balance overflowed its container on the settings page. That is precisely the class of bug that ships in fintech MVPs: currency formatting, locale-specific separators, rounding, and negative-balance styling. Pixel verification catches all of it, because it is comparing what the user actually sees, not what your test author remembered to assert.
Live financial dashboards are noisy by nature - balances tick, timestamps update, transaction rows get inserted - so a naive screenshot tool would flag every run as changed. This is where the data filter earns its keep: mask selectors plus auto-masking of dynamic content and text-region-aware OCR diffing let you ignore the live numbers while still catching a broken layout or a mislabeled column. Insert a new transaction row and page-shift detection scopes the diff to the region that moved instead of reddening the whole screen. And because Lastest is self-hosted and open source, screenshots of sensitive financial UIs never leave your own infrastructure - a real compliance win when the alternative is uploading account balances to someone else's cloud.
Before you wire this into CI, it is worth being honest about what manual QA on a money flow was already costing you: we did the math on that here. Or skip ahead and watch the live demos to see a diff report on a real dashboard.
Step 5: Wire it into GitHub Actions so broken PRs cannot merge
The whole point of writing a test is that a robot runs it for you. Drop this file at .github/workflows/lastest.yml in your app repo:
name: E2E
on: [pull_request]
jobs:
  test:
    runs-on: ubuntu-latest
    steps:
      - uses: actions/checkout@v4
      - uses: pnpm/action-setup@v3
      - run: pnpm install
      - run: pnpm build && pnpm start &
      - run: npx wait-on http://localhost:3000
      - run: npx lastest run --project my-saas --baseline-from main
      - uses: actions/upload-artifact@v4
        if: failure()
        with:
          name: lastest-diffs
          path: lastest-report/
Commit, push, open a PR. The action boots your app, runs the recorded flow as pure Playwright, screenshots every step, and diffs against the baselines from main. If anything regresses, the check turns red and GitHub blocks the merge. If something changed intentionally, you click "approve new baseline" in the Lastest UI and re-run.
Total AI cost for this run: $0. You spent tokens once, when you generated the test in step 3. Every replay forever after is just Playwright doing what Playwright does.
What to record next
The signup-to-checkout flow is your highest-value test, but you should not stop there. Spend another fifteen minutes this week recording:
- Forgot password - the flow nobody tests until a real user can't get in
- Settings update - change name, change email, change avatar, save
- Billing cancel and resubscribe - the Stripe portal round-trip that breaks the most when you upgrade dependencies
- The single most important "happy path" inside your product - for a writing app it's "create doc, type, save, reload, content still there"
Five tests. Maybe twenty minutes of recording. That is your entire QA suite, and it covers the flows that actually matter to the customers paying you.
Bonus: let Claude Code or Cursor run the tests for you
Lastest ships an MCP server with around 20 tools, which means Claude Code, Cursor, and Windsurf can list your tests, run them, read the diff reports, and propose fixes - all from inside your editor. Add the MCP endpoint to your .cursor/mcp.json or Claude Code config and you can literally type "run the checkout test and tell me what broke" into the chat. The agent does the rest. We wrote up the full pattern in the MCP testing loop for solo founders.
If you want to go further, the Play Agent is an 11-step autonomous pipeline (Scout, Planner, Generator, Healer, Reporter, and friends) that can crawl your app and propose new tests on its own. I would not turn that loose on day one - record your critical paths by hand first so you trust the tool - but it is there when you are ready.
The math, one more time
You just got back the 6 to 7 hours a month you were spending on manual smoke tests. Over a year, that is most of a working week. The tool cost you nothing because it is open source and self-hosted. The AI tokens cost you nothing on every run because replays are pure Playwright. The QA hire you were dreading is no longer in the budget conversation.
Now go ship the next feature. The robot has the regressions covered.
Start your five-minute test suite
Self-host it free, forever. Clone github.com/las-team/lastest, run docker compose up -d, and follow the docs. It is open source under FSL-1.1-ALv2, your screenshots never leave your network, and replays cost nothing in tokens. If you would rather skip ops, Lastest Cloud is a flat $299/month with a free evaluation tier so you can try before you pay.
For a quick-start curated to your stack, head to the solo founders page, browse the live demos, or read the next step up: the MCP testing loop for solo founders. Five minutes to your first test. No QA hire required.
Building something that touches money? Spin up a project at app.lastest.cloud and point it at your checkout or dashboard - the free evaluation tier will diff your first money-path screenshot before you have finished your coffee. If a rounding bug or an overflowing balance is going to reach a paying customer, you would rather it reach a red CI check first. See exactly what that costs you today in what manual QA actually costs a solo SaaS founder.